


Have you ever wondered what is important in mobile photography or wondered what you can do to improve your mobile photography? A mobile photographer is someone who takes pictures with their smartphone with the goal of using the images for personal or professional purposes; like sharing on social media, document their travels, promote their business and products, printing photo albums or other print products, capturing family life, etc.
Basically, we are all mobile photographers in some sense and we all know how to push the capture button on our phones. However, it takes more than the push of a button to take good quality images that serve your purpose. It requires some basic knowledge, the willingness to learn & improve, and lots of practice.
In this article, you will learn about 10 basic tips that:
- are good to know
- are easy to learn
- are easy to implement
- will improve your photos significantly with minimal effort
Our smartphone cameras are getting smarter and smarter, which means – in most situations – you can trust the automatic settings to take fairly good pictures. However, there are a few basic things that you should be in control of and not leave to the camera to decide. Knowing and taking advantage of these tricks will save you time and frustration and help you get better pictures every time.
Please note; I have used my iPhone to capture the screenshots below, but the tips are relevant for other smartphones as well. Just be aware that the function/setting might have a different name, placement, or icon. A quick google search should help you out if you’re stuck and can’t find the equivalent function on your specific phone.
With no further ado, these are my top 10 tips to improve your mobile photography.
1. Clean your lens
This is hands down the most common reason for getting bad quality pictures with any smartphone. The small lens very easily collects dirt and lint from being carried around. A crystal clear lens will give you sharper images, so it’s definitely worth the extra 5 seconds it takes to clean it with a handkerchief (or your T-shirt) before taking the shot.
2. Use the grid lines to compose better
Using the grid lines in the camera app will help you compose the image better. If you have knowledge of the rule of thirds, you can use the lines to help you find the best placement of your subject. If you don’t know what the “Rule of Thirds” is, you can read all about it in this article. The lines will also help you avoid skew horizons.


This is how to turn the grid on with an iPhone:
Open settings -> Camera -> turn on “Grid”
3. Turn HDR on
The HDR function in iPhone cameras can be great in high-contrast lighting situations. HDR (High Dynamic Range) means that your phone takes several photos in rapid succession using different exposures and blends them together to bring more details in both lighter and darker areas of your photos. When you have “Auto HDR” turned on, your camera will only use HDR if it renders it necessary. If HDR is used, the camera will take one picture with normal settings and one with HDR, so you can compare the images and choose which version YOU like best. Turn on “Keep Normal Photo” in Settings to make sure you have both versions. You can delete the one you like less afterward.


How to turn HDR on:
Go to settings -> camera -> click “Auto HDR” + Keep normal photo
4. Set the focus
Don’t let the camera decide where the focus should be. Be in control of your image and tap the area that YOU want to focus on.
Btw. did you know you can lock the focus on your iPhone? If you tap and hold on the area that you’d like to focus on, the focus will stay put, even if you move the subject you focused on. This can be handy if you want to get creative. I.e. for “blur on purpose” pictures, or if you’re shooting through glass with raindrops. It can be challenging to focus on the raindrops, but you can put something like a paper close to the glass and lock the focus on that, move the paper away and the raindrops will still be in focus.

5. Don’t use flash
I don’t advise to use the iPhone flash ever. Simply said, it doesn’t work well. The flash makes a photo look overexposed, it will alter the colors badly and faces will look washed out. It will also overexpose objects with reflecting surfaces. Instead of using flash, look for sources of natural light and move your subjects into the light. Or get creative, i.e. take silhouette photos.


6. Don’t use the digital zoom
Using the digital zoom is actually the same as cropping your image in post-processing, so it means you’ll get a smaller image with less quality. It will look grainy, blurry, and pixelated. The better way is to take the shot as is (without zoom) and then crop it afterward. That way you’ll have better control of the composition and the quality.
Another way to “zoom in” is to physically get closer to the subject or to use the telephoto lens if you have a newer iPhone model. To use the telephoto lens, click on the white circle with 2X showing on the image in the camera app (only available on the newer iPhones, I have iPhone8, so I don’t have this feature)
7. Set the exposure manually
In some situations controlling the exposure can make or break an image. Your camera will analyze the lighting situation and set the exposure based on an average, but that’s not necessarily how YOU want the image to look. By tapping your screen with your finger you can set both focus and exposure the way YOU prefer. First, tap to set focus, then move your finger up and down if you want to change the exposure. My advice is to expose for the lighter areas (making the image darker). Areas that are blown out (overexposed) will lose details and you will not be able to recover them in post-processing. The darker areas on the other hand can be brightened later, so it’s better to have a too dark image than a too bright image.
Check out this mini-tutorial where I show you how it works:
8. Keep a steady hand
I know it’s fun to just quickly take an image without giving much thought into how you’re holding your phone, but a shaky hand will give you less quality. So, if you want your image to have the maximum quality from the get-go, try to notice how you’re holding the phone, stabilize your posture, breath in, hold, click, breathe out.
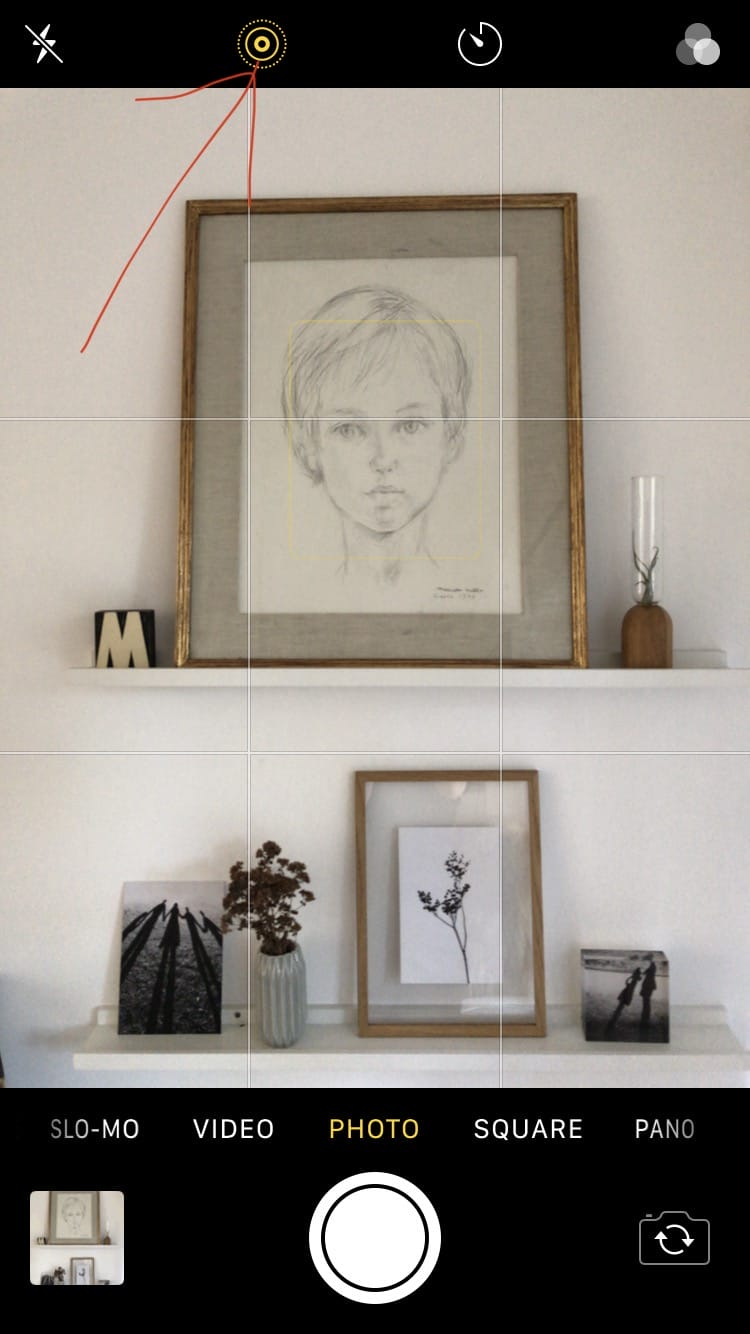
9. Turn off “Live”
Don’t use the “Live” function if you want top-quality images. It’s a cool feature, but it will not give you the best quality, so use this only if you want the live effect especially.
You can turn the live function off inside the camera app (second icon on top left) If the icon is yellow, “live” is on.
10. Don’t use the in-camera filters
Have you ever had your images all turning a weird color and not known why? It’s very likely you’ve turned on the filters inside the camera app without knowing it. I advise everyone to keep the filters off during shooting and to rather add filters in post-processing. That way you have more options and better control of the final look of your images.
I hope these tips have been insightful and will help you take better images with your mobile phone. If you would like to learn more about mobile photography and photography in general, I invite you to join my newsletter where I send you tips and tricks and mini-tutorials directly to your inbox. I also have an in-depth mobile editing class in the making and my email subscribers will be the first to hear about it going online. As a subscriber, you’ll receive a special discount – only for my subscribers, so if this all sounds interesting to you, I hope to see you over there.